This is done together with my co-worker David.
Calabash-ios is an open source tool for functional testing of iOS apps. It has several advantages that put it ahead of other tools, and has maintained its popularity since it was introduced.
One complaint I have about calabash-ios, however, is the extra target I need to create and maintain. In a rather large project with many developers, they all have to remember to add any new classes and resources to both the regular target and the calabash target. Frequently this is forgotten, forcing quality engineers to waste time deciphering build error messages and adding missing files to the calabash target, one by one.
Another problem with the old approach is that adding a new target automatically creates a bunch of new files in the project.
We are so happy to announce that we have found a better way! Our new approach is to create a custom configuration for calabash on the existing target. We also add a new scheme for calabash-ios to build with our custom build configuration.
Here is how to do it, using the original calabash-ios example project as an example. First, clone the project and open it in Xcode.
1. Before we start
Ruby and calabash-cucumber gem are needed just as with the current calabash-ios set up. (You may need to do sudo gem install calabash-cucumber)
gem install calabash-cucumber
2. Download calabash.framework
In your project’s root folder, download the latest version of calabash.framework with calabash-ios gem command:
calabash-ios download
You can put it in the root folder of your project or another folder, but please remember that later you will need to configure the path in your settings. For simplicity, we just put it in the root folder of the project.
3. Create a configuration for calabash-ios
In the project navigator click on your project, then in the project and target list click on the project again (Not the target). Then click the “info” tab in the standard editor, and find the “configuration” section.
Click the “+” button in the “configuration” section and choose “duplicate Debug configuration”. A new configuration with name “Debug Copy” will be created, change its name to “calabash”.

4. Add other linker flags to your calabash configuration only
In the project and target list, click on your regular target, then click the “Build Settings” in the standard editor, and search for “other linker flags”. If you can’t find anything make sure “All” tab instead of “Basic” is selected. Click “Other Linker Flags” in the table, then click the arrow to open it. Now move your mouse to the row that says “calabash” and a “+” button should show up. Click the “+” button, then in “Any Architecture | Any SDK”, enter
-Objc -all_load -framework CFNetwork -framework calabash
This will add both CFNetwork and calabash framework to your project when you run the project using calabash configuration.

5. Now you need to tell Xcode where to find your calabash.framework.
In the same “Build Settings” as step 4, make sure your LPSimpleExample target is still selected. Search for “Framework Search Paths”. Click “Framework Search Paths” in the table, then click the arrow to open it. Now move your mouse to the row that says “Framework Search Path” and a “+” button should show up, click the “+”, then in “Any Architecture | Any SDK”, enter
$(SRCROOT)

NOTE: $(SRCROOT) is your project root folder where your .xcodeproj file is located. We are telling xCode to search framework files here. As mentioned earlier, you can download calabash.framework in other folders, just make sure to use the correct path here.
6. Create a scheme for calabash.
In Xcode menu choose Product–>Scheme–>Edit Scheme.

In the edit scheme window, make sure “LPSimpleExample” is select in the “Scheme” list, and click the “Duplicate Scheme” button on the lower left. Then in the “Scheme” list, change the name of the newly created scheme from “Copy of LPSimpleExample” to “LPSimpleExample-calabash”.

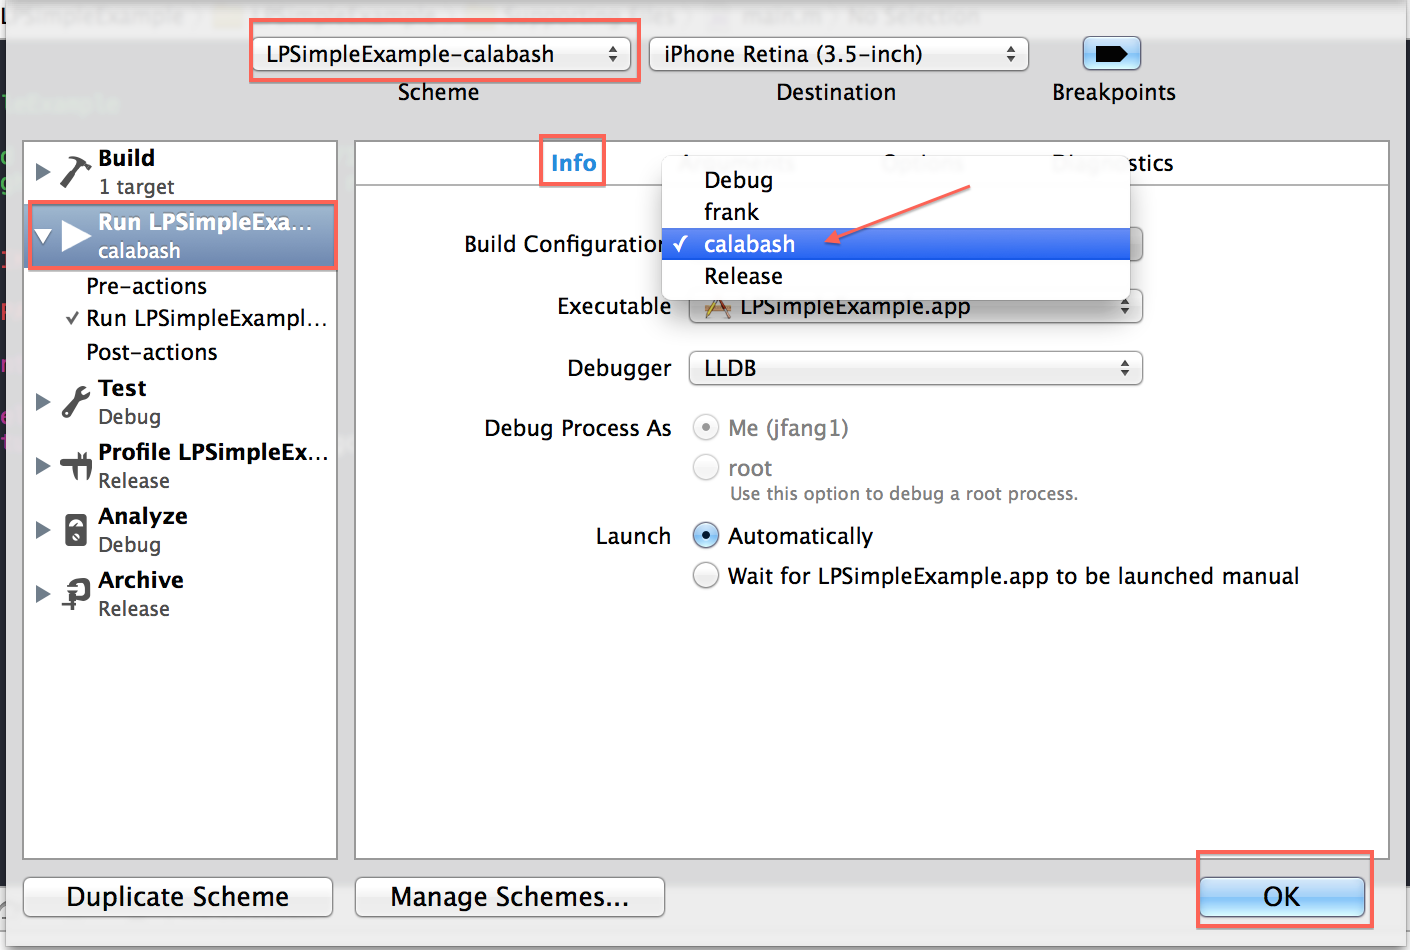
7. Set the LPSimpleExample-calabash scheme to use your calabash configuration.
Make sure the newly created “LPSimpleExample-calabash” is selected in the “Scheme” list, click “Run LPSimpleExample” on the left panel. Now on the right panel, click “info” tab, then choose “calabash” from the drop down list for “Build Configuration”. Click OK.
8. That is it!
Now run it. In Xcode, make sure the newly created “LPSimpleExample-calabash” scheme is selected (to the right of the “Run” and “Stop” button), and then click “Run” button to run the calabash scheme. You should see the familiar message like “Started LPHTTP server on port 37265″ and “bonjour Service Published …” etc.

9. Now you can start calabash-ios console to do queries or calabash-ios gen to generate your feature folder.
Note: if you are using Cocoapods you need to remove the Pods folder and do “pod install” again so that the new configuration will also show in the pods.
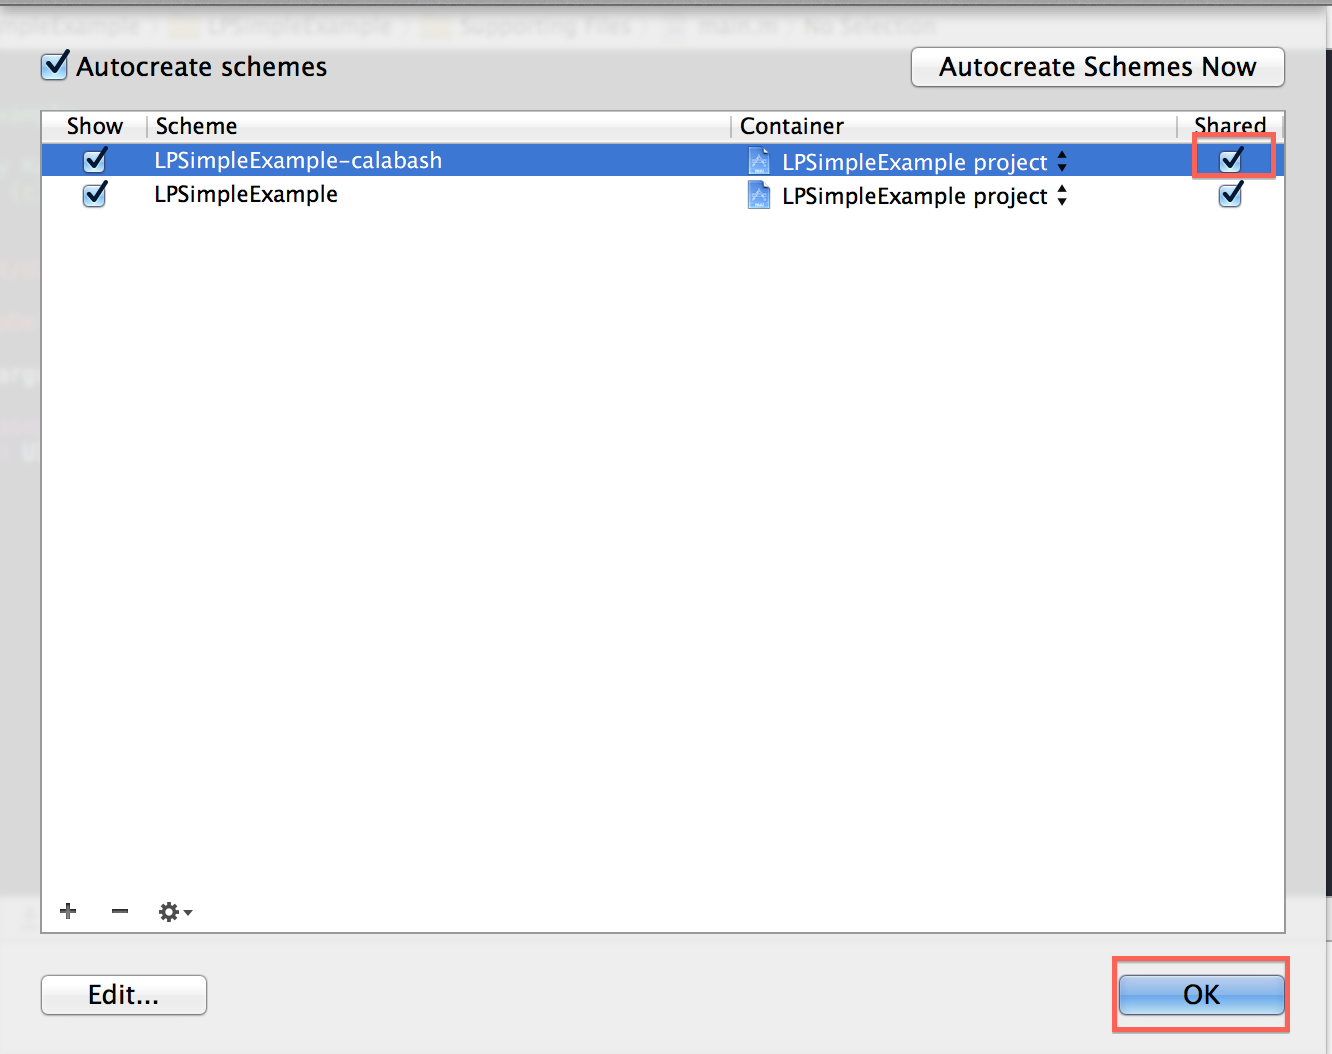
Note: If you are using git. The new scheme is not detected automatically. Go to Product–> Scheme–>Manage Scheme and check the “shared” check box on the LPSimpleExample-calabash scheme, then you will see a LPSimpleExample-calabash.xcscheme file in git status. Git add this file and push the change.